
Finally, on to the next project! This one was a team-effort. Matt was away for work for a couple of days and I had to pick him up at the airport on Friday. So, I planned a visit to my friend Melissa on Thursday to work on projects and stay over, saving me from having to get up quite so early on Friday since she lives closer to the airport. We planned ahead and bought and stained the boards for the growth chart rulers we both wanted to make so we could work on the project together. This project can be as cheap or expensive as you make it, basically, and it is really, really easy.
I don't have pictures of my board before I stained it, but Melissa is better at taking pictures of every step of her project process, so whenever she blogs about her side of the project, you can see her board before, I'm guessing. Anyway, I decided to go for a poplar board from Lowe's. I chose this board, and effectively made my project more expensive than it necessarily needed to be, because my experiences with the "cheap" boards (between $5 and $8) seem to always end with slightly (or extremely) warped or beat up boards. Melissa, however, was able to find a really good knotty pine board for about $6 or $7, she said, so I was a little jealous. She must have really taken her time to pick out the least warped one - or maybe Home Depot has a better cheap board selection. However, since the board was the main cost of the project, I didn't feel too bad that my 6' poplar was $16 ... it was still way cheaper than some of these "professionally" made rulers for sale online. But I probably could have found a decent one for less if I really wanted. I also bought red oak stain in a little pint tin for about $5. So, my project came to about $20.
First, sand and stain the ruler. I am a lazy sander so I just did a slight sanding, and my board is still a little rough to touch, but I don't plan on anyone rubbing their hands over it much, so I'm not too worried. I will say that Melissa's board was amazingly smooth, thanks to her husband. I think if Matt had been around he would have done the perfectionist thing and sanded my board nice for me, too. I stained one coat on each side and then did one thin coat of polyurethane on each side. I was not sure if I really needed that, but wanted to give it a little extra protection. I did this a few days before, of course. After it was all dry, I took the board to my co-crafter's house and we got to work.
First, sand and stain the ruler. I am a lazy sander so I just did a slight sanding, and my board is still a little rough to touch, but I don't plan on anyone rubbing their hands over it much, so I'm not too worried. I will say that Melissa's board was amazingly smooth, thanks to her husband. I think if Matt had been around he would have done the perfectionist thing and sanded my board nice for me, too. I stained one coat on each side and then did one thin coat of polyurethane on each side. I was not sure if I really needed that, but wanted to give it a little extra protection. I did this a few days before, of course. After it was all dry, I took the board to my co-crafter's house and we got to work.


You can use a tape measure to mark each inch. I made a slightly longer mark at each foot mark. What I suggest doing for the growth chart is to start the board at 6 inches. This way, you can hang the board up and it will give you a little room over 6' with just a 6' board. You could also buy a longer board and let it just sit on the floor, but for Matt and I, 6' 6" is more than we should need for our kids and I wanted to hang the ruler. This means the first foot mark will only be six inches up from the bottom of the board, and you'll want to make sure to hang it six inches from the floor.

I used a Sharpie to mark and color my lines and I think it worked fine. Melissa used a paintbrush, which was a little more tedious to control but also looked good. The picture above is just an example of my first marks. I then went back to thicken and lengthen the lines.

Break for a delicious dinner of grilled chicken and zuccinni and chips. Thanks guys!
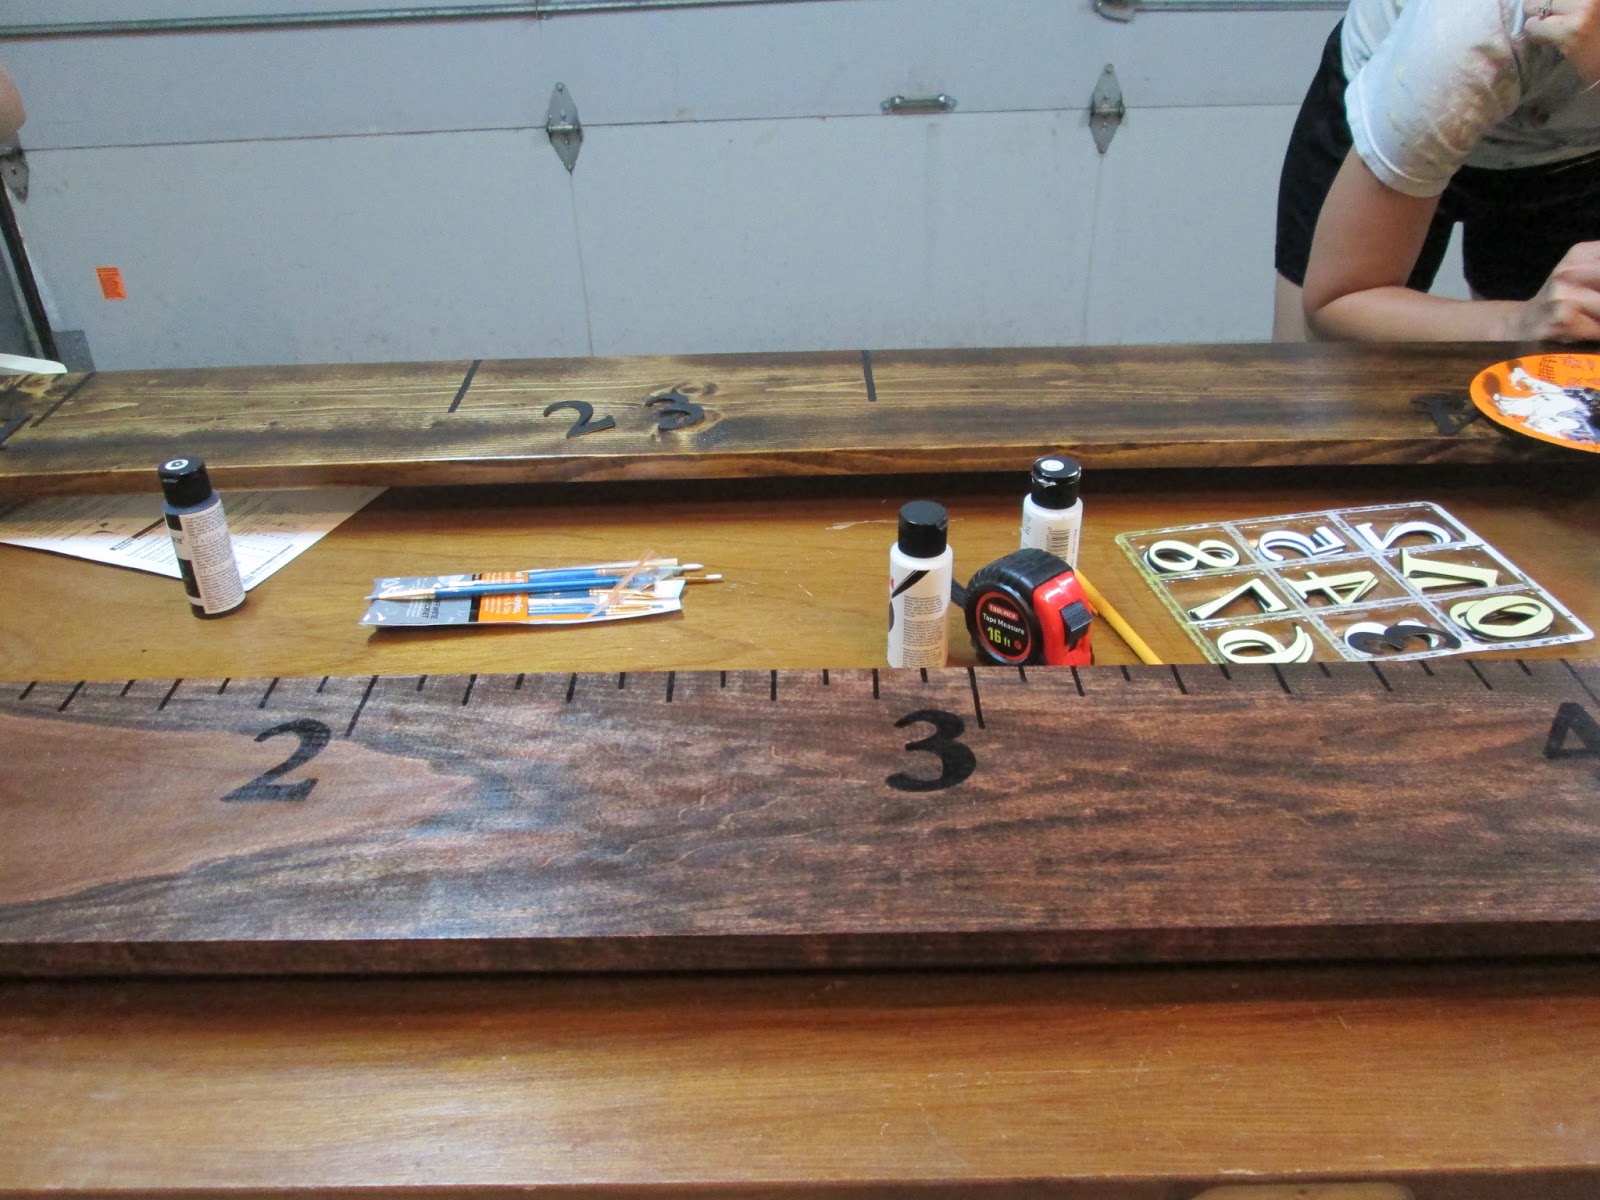
Back to work. You can see I've now got all the lines marked and drawn to the lengths I wanted. I borrowed Melissa's stick-on numbers and traced them then colored with Sharpie. There's Melissa, working away.

And finally, the two finished products. A really easy DIY project. Now all I need to do is attach something to the back to hang it. I am planning to nail in one of those self-leveling hangers with the little teeth at exactly 5' 6" on the back of the board (which will not align with the mark for 5' 6" on the front of the board, but would align with 6'). This way when I hang it, I can measure to an even 6' off the floor and the board should then hang so that the numbers are correct. I plan to measure Matt and I on the board since we are now at the tallest we'll ever be (no, Wyatt, I'm not going to mark if we shrink, but I'll be able to look back at least and say, "Well, I was once over 5'...") and then someday we'll measure our children's heights each year. I'm excited to get another project down in the midst of school! As Melissa said, I'll have to focus on the quick and simple ones for a little while.
Hi! So I bought the board and the tint. Do I need the polyurethane?
ReplyDeleteoh and you used a dark tint so what are you using to mark the kids height? Thanks!!!
ReplyDeletePolyurethane is probably optional, but I think it gives it a nice shine - also be careful touching it for a few days if you don't Poly it because when I have stained things and left them at that sometimes the stain will rub off on you a bit until it is completely dry.
DeleteSince I used a dark tint, I am marking heights with a silver sharpie, but you could also use like a chalk "marker" (it is like wet chalk in a pen) or paint pen that was white or a silver. I'm guessing your stain is dark, too, since you ask.
Good luck! I hope it turns out great!